
This article is written for: ✅ Zello Work ❌ Zello Friends & Family.
Zello is built for fast, reliable push-to-talk. Now you can make voice and video calls right in Zello. Calls lets you go from a PTT message to a live conversation without swapping personal phone numbers, and take calls even when Zello is in the background or your phone is locked.
Note: Calls is currently in beta. Reach out to your Zello account manager if you're interested in beta testing this feature.
Using Calls on mobile
When Calls is enabled for a network, users on that network can place 1:1 calls with other users on the network. This section covers using Calls on Android and iOS.
Starting a call
To start a call, follow these steps:
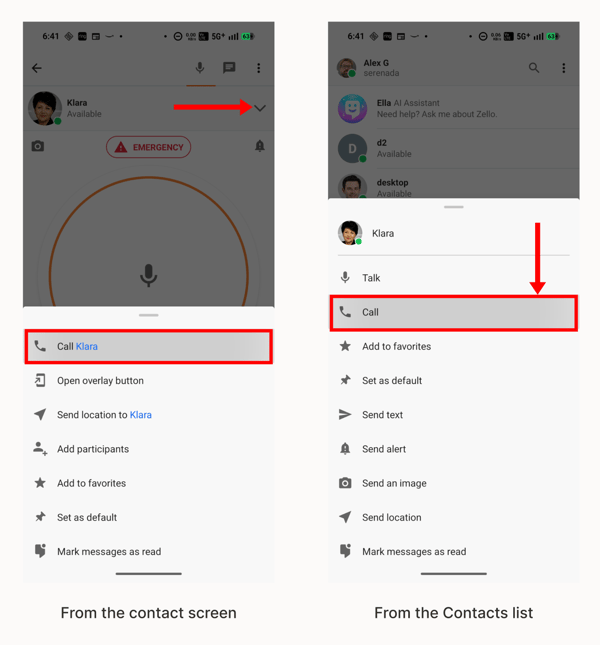
- Android: select the contact you want to call, tap the down arrow next to their name, and select Call [name]. You can also press and hold the contact in your Contacts list and select Call.
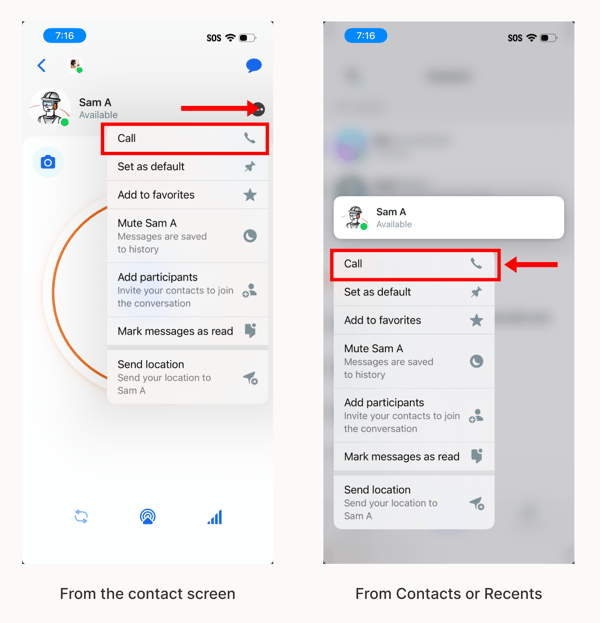
- iPhone: select the contact you want to call, tap the three dots next to their name, and select Call. Press and hold the contact in your Contacts or Recents list to get the same menu.
On your first call over Wi-Fi, iOS asks for permission to find devices on your local network. Allow it for the best connection.
Calls ring for 45 seconds. If the person doesn't answer, they get a missed-call notification to let them know you tried to reach them.
Answering / declining a call
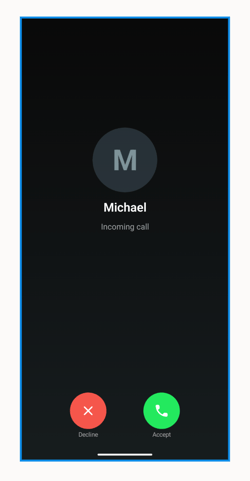
Answering and declining a call in Zello works the same way it does for a traditional phone call. Tap Accept to pick up, or Decline if you can't take the call at that moment.
During a call
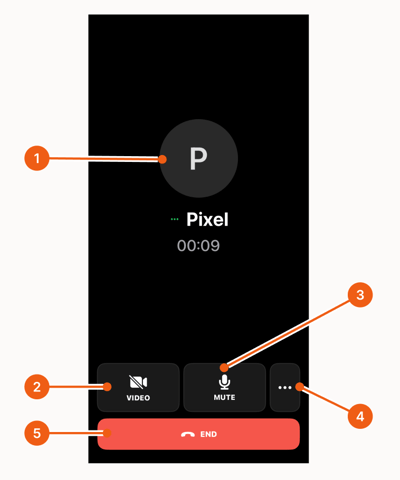
When you join a call, a number of buttons appear on the screen. Here's what they do:
-
Call info. The other person's name, profile picture, and how long you've been talking.
-
Video. Turns your camera on and off, and turns green while your camera is on.
-
Mute. Turns your microphone on and off, and turns red while you're muted. On Android 14 and later, the system can cut microphone access while Zello is in the background, so bring Zello to the foreground if your microphone stops working.
-
More options. Lets you choose whether the call audio comes out of your speaker, and lets you share your screen.
-
End. Hangs up the call.
Turning your camera on adds a few more controls to the call screen: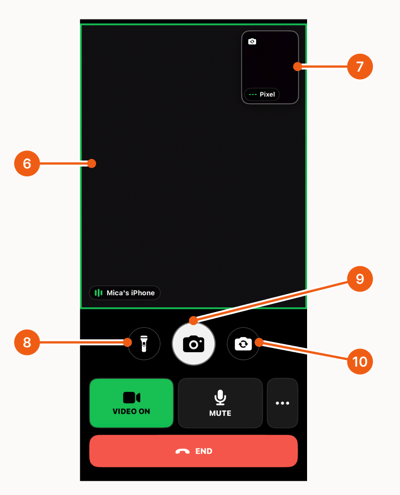
-
Your video. Once your camera is on, your own video fills most of the screen, so you can see what you're showing the other person.
-
Participant tile. The other person on the call, in the smaller tile.
-
Flashlight. Turns on your device's flashlight when you're using the rear camera.
-
Snapshot. Captures a still photo from the live video and sends it into the conversation as a regular Zello image message. The other person needs to be able to receive images.
-
Flip camera. Switches between the front and rear cameras.
Using Calls on desktop
Starting and answering/declining a call
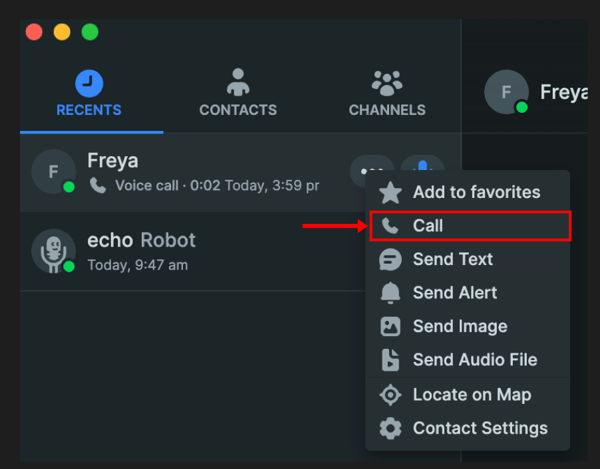
From your contact list, select the three dots next to the person you want to call and then select Call.
When you receive a call select Accept to answer the call or decline it by selecting Decline.
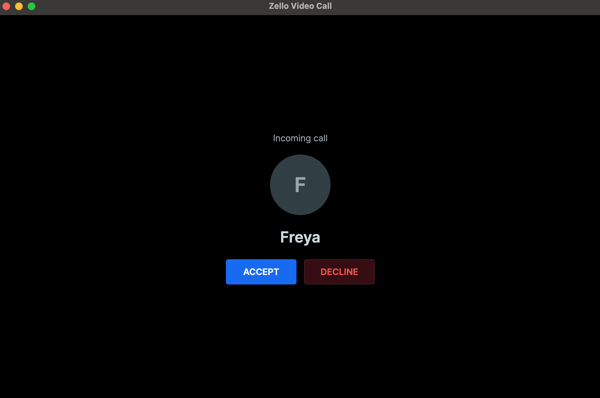
Each call opens in its own window, so you can keep working elsewhere in Dispatch Hub while you talk.
During a call
When you join a call, a number of buttons appear on the screen. Here's what they do:
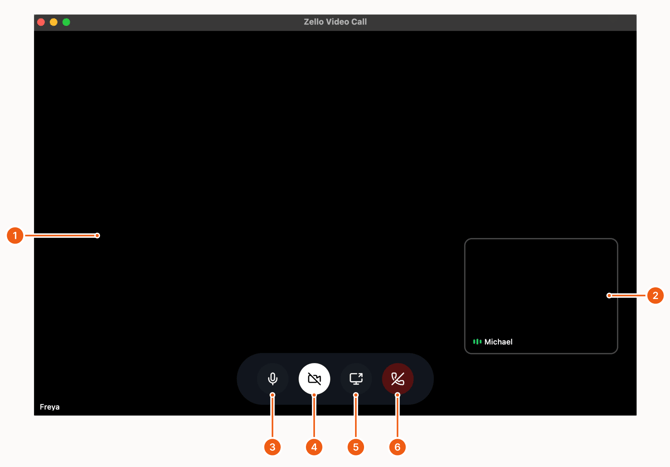
- Video frame. Video from the other person fills the window, with their name in the corner.
- Participant tile. Your own camera sits in the smaller tile.
- Mute. Turns your microphone on and off.
- Video. Turns your camera on and off.
- Share screen. Shows the other person what's on your screen, like a work order or an error message you can't easily read out. On macOS you're asked to grant screen-recording permission the first time.
- End. Hangs up the call.
Dispatch Hub uses whatever microphone, camera, and speaker your computer defaults to. To use a different one, change the defaults in your operating system settings.