This article is written for: ✅ Zello Work ❌ Zello Friends & Family.
What are channels?
Channels facilitate group communication with specific users on your Zello Work network. When a message is sent to a channel, it's received by all users provisioned to that channel—enabling unified, targeted communications.
Channels are established by an admin from the management console. When you create your Zello Work network, an Everyone channel will be automatically generated that includes all network users. Admins can also set up additional, more focused channels that speak to specific users' communication needs.
Why use channels? Let's say you work at a construction company. Your network’s Everyone channel will include all licensed users, but if you want to communicate only with members at your site, a network admin can create a secure channel specifically for the those individuals. Channels narrow communications so that chatter is minimized and relevant messages are delivered to the intended recipients.
Additional points to note about channels:
- Only admins can create channels.
- There are no limitations on the number of users assigned to a channel. However, only 10,000 users can be connected at one time. Contact Zello Support if additional capacity is needed.
- There are 4 different types of channels, each of which carries unique permissions regarding user communication: team, dynamic, hidden, and dispatch. See this article for a breakdown of the different features available in each.
- The Everyone channel can be deleted.
- Channels operate as a secure, configurable space that allows users to communicate quickly with each other. Users can only send messages to channels they've been provisioned to.
Creating a new channel
- Sign in to your network’s management console at [yournetworkname].zellowork.com.
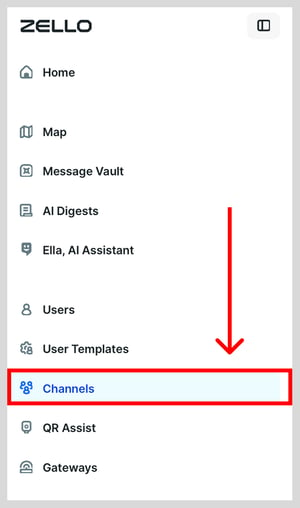
- Select Channels.

-
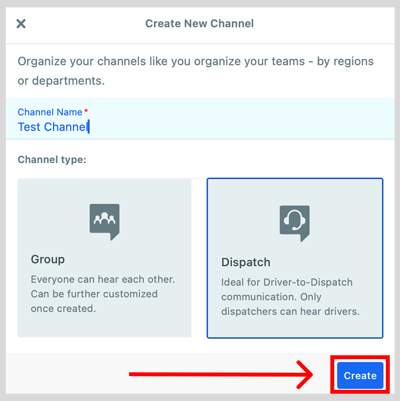
Assign your new channel a name and specify the channel type. Note that the channel settings and channel typ e can be changed at any time. Click Create.
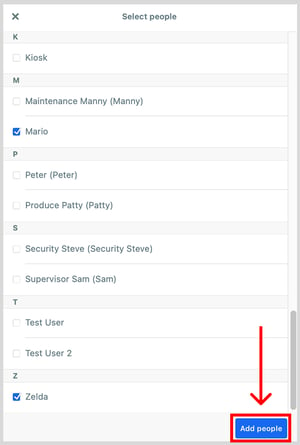
- Select the users you’d like included in the channel. Note that you can add or delete users at any time. Then, click Add people.
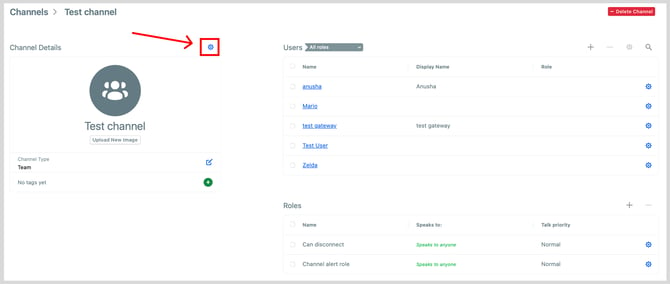
Adding users to an existing channel
- Sign into your network’s management console at [yournetworkname].zellowork.com.
- Select Channels.

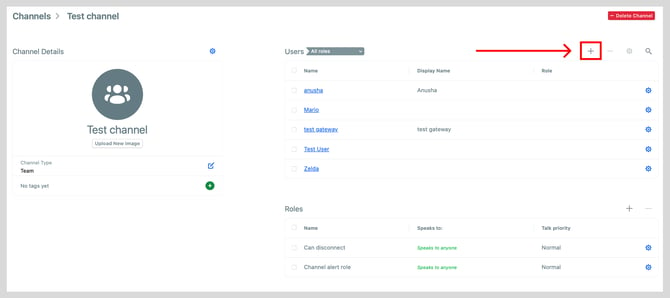
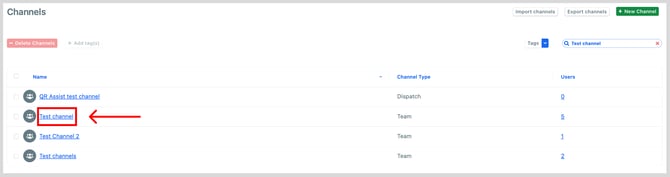
- Select the channel you would like to add users to.

- Select the plus sign + located at the top of the Users section.
-
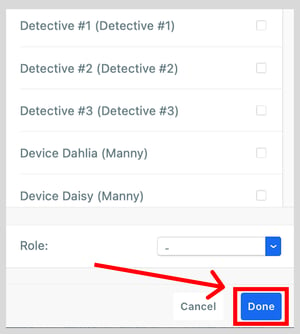
Click the checkbox next to the usernames you’d like added to the channel. To add all users in the network, use the check box marked "select all".
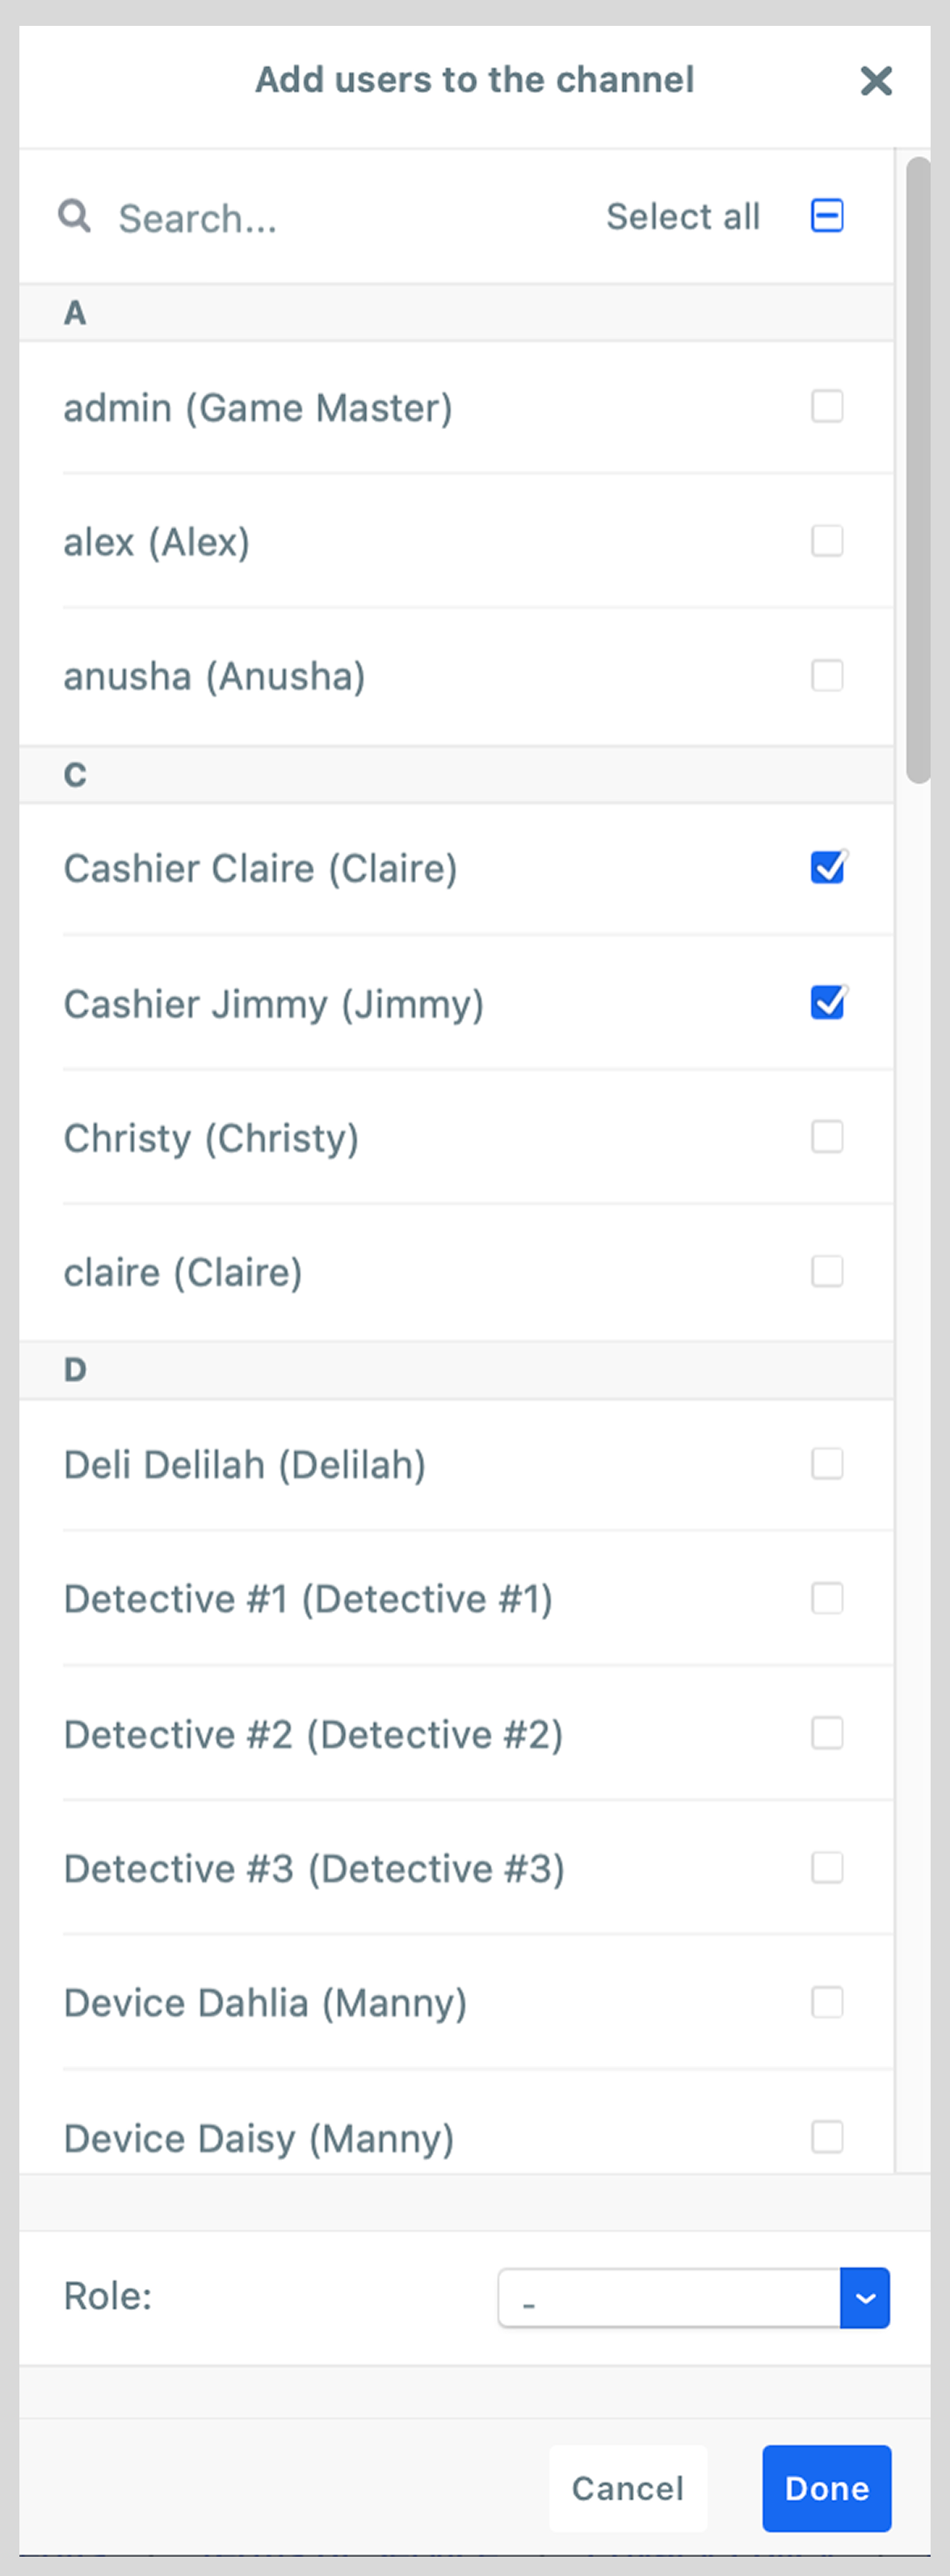
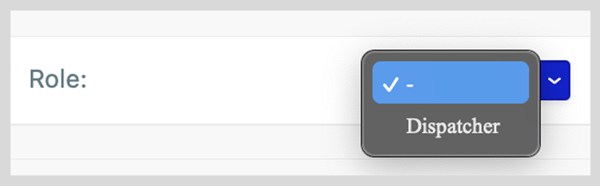
Note: You can use the drop down menu at the bottom to assign channel roles to these users. This can be especially helpful when adding users to a dispatch channel, where you can assign these users the dispatcher role by selecting Dispatcher.
- When the appropriate users have been selected, click Done.
Advanced Settings
When establishing a new channel, consider instituting parameters regarding voice message length. The default message length is unlimited; however, if two users are trying to speak at the same time, the default interruption time is one minute.
To change the channel’s message length, follow the steps below:
- Sign into your network’s management console at [yournetworkname].zellowork.com.
- Select Channels.
- Select the channel you would like to change the settings of.
- Click on the settings icon located at the top-left corner of your channel’s information box.
- Alter the message duration and interruption time as you see fit. When done, click Save.
|
|